Sub-Zero repair cost in Belmont explains planning bands, evidence and quote limits.
Technical page / alarms and controls
Do not buy a Sub-Zero board from an alarm alone
Sub-Zero alarms and service indicators are model-specific clues, not universal parts orders. A Belmont unit with a display alarm might have a temperature event, door seal issue, thermistor fault, airflow problem, control response issue or sealed-system symptom. The correct path starts with the model tag and visible conditions.
Service indicatorWarm alarmDisplay blankDoor alarmRepeated reset
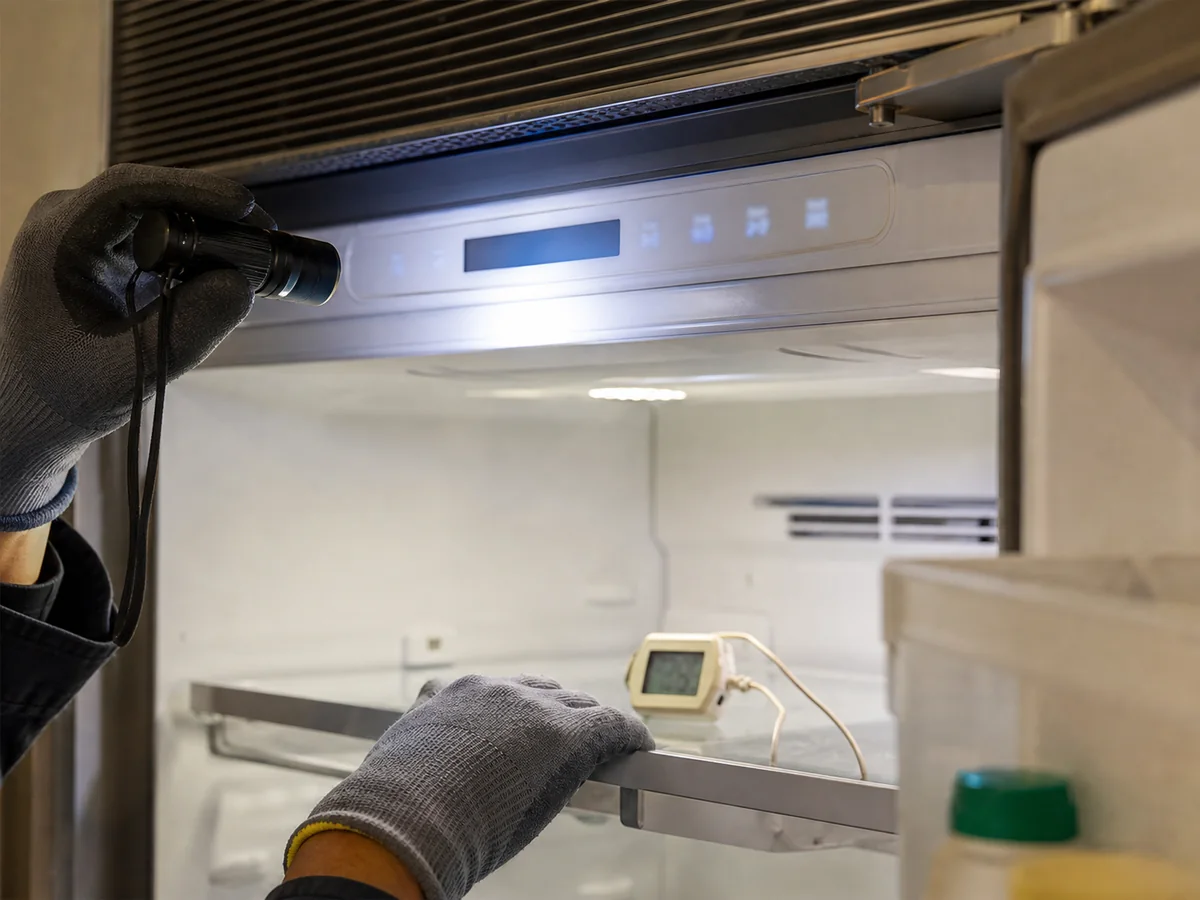
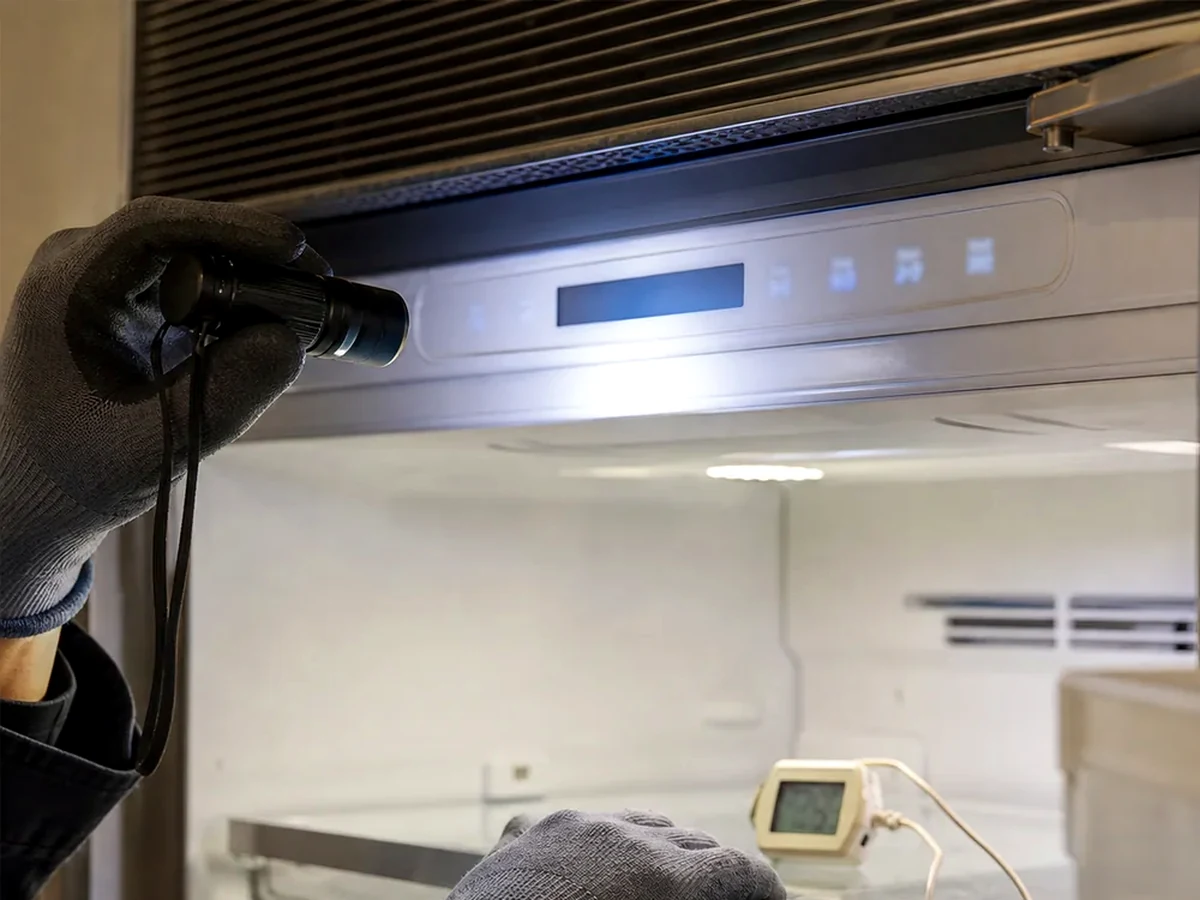
Safe homeowner recording
Photograph the display, note when the alarm appeared, record fresh-food and freezer temperatures if safe, and check whether the door was left open or the grille is blocked. Do not open control panels, bypass switches, reset repeatedly or buy a board from an online code list. Refrigerant, live electrical and board-level diagnosis should be handled by a technician with the correct model information.
Alarm diagnostic table
| Visible symptom | Possible component | Confirmation test | False-positive to avoid | Repair path |
|---|---|---|---|---|
| Warm alarm | Door seal, fan, sensor, cooling system | Temperature trend and airflow | Assuming sealed-system failure | Find temperature cause |
| Door alarm | Switch, hinge, panel alignment | Door contact and reveal check | Replacing controls first | Alignment or switch diagnosis |
| Display blank | Power, display, board, harness | Safe voltage and response checks | Buying display only | Electrical diagnosis |
| Repeated reset | Control or unresolved temperature fault | History and post-reset trend | Clearing evidence | Root-cause test |
| Ice/water alert | Water path, freezer temp, module | Fill and harvest observation | Module from code alone | Water-path repair |
| Wine zone alert | Sensor, fan, seal, load | Zone trend | One-time bottle load | Stability diagnosis |
| Service light after cleaning | Sensor/control state or unresolved fault | Model-specific process | Universal reset chart | Verify by serial |
Model-family cautions
- BI and classic built-ins: verify whether alarm behavior follows the specific control generation.
- Designer columns: door and panel alignment can trigger alarms that look electrical.
- PRO units: display behavior and service access can differ from built-in columns.
- Wine storage: zone alarms need temperature trend, not just display reading.
- Undercounter units: cabinet pocket heat can create repeated warnings in tight installations.
Evidence photos
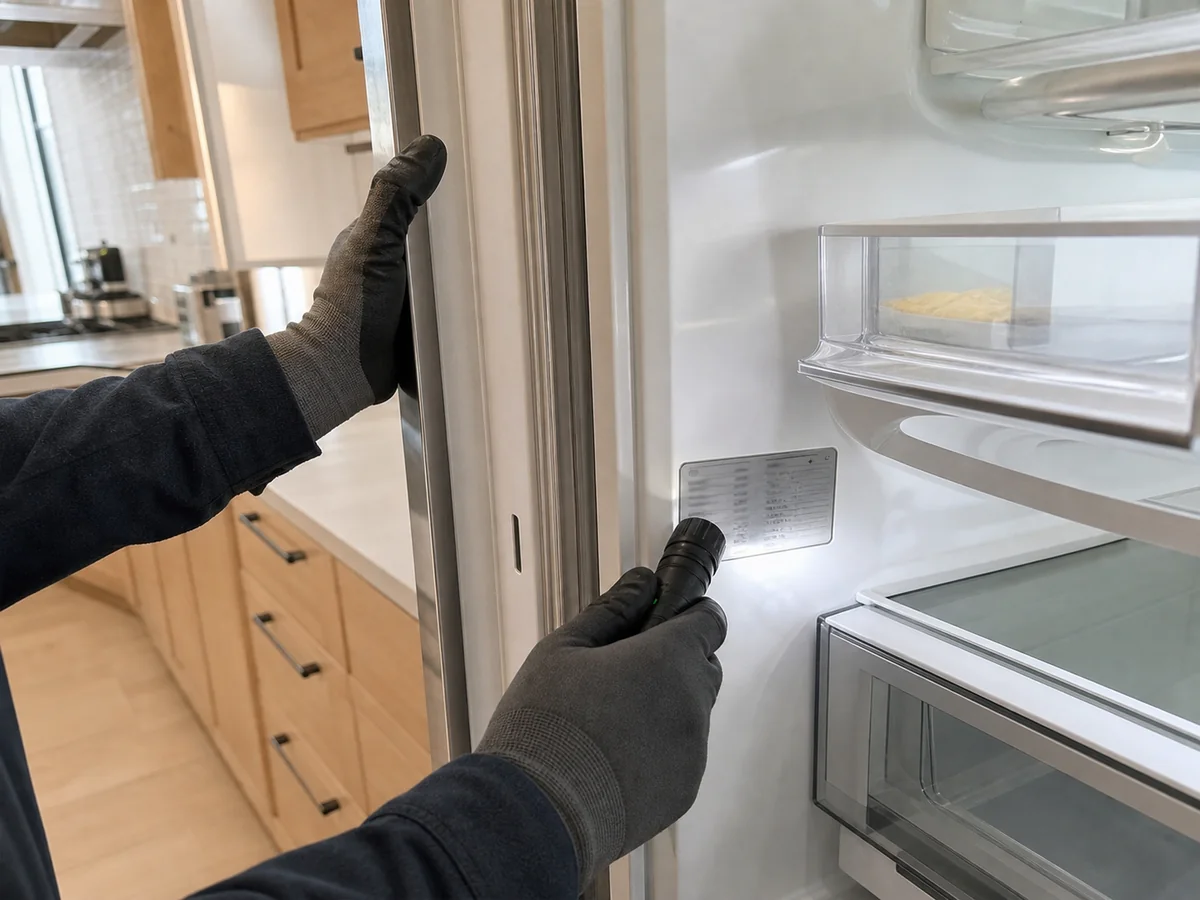
How to describe an alarm without losing evidence
Write down the exact time the alarm appeared, the compartment temperatures, whether the door was recently open, and whether the unit was cleaned, loaded or reset earlier that day. If the display changes after a reset, photograph both states. A Belmont call that starts with this history can separate a door event near a heavy panel, a warm-compartment event after condenser restriction, and a real control response issue. Without that history, the same alarm can look like three different repairs.
Belmont and Redwood City route note
Calls routed between Belmont and Redwood City can often be scheduled efficiently, but alarm work still benefits from pre-visit photos. If the unit is in Carlmont or near Ralston Avenue, parking and access may be easy; if it is in Belmont Hills, the visit window and part readiness matter more. The route is local, but the diagnosis remains model-specific.
Call or book online
Use the phone number or the external booking page to schedule service. Keep the model, symptom, temperature readings and access notes ready for follow-up.
Last updated and scope
. This technical page covers Sub-Zero alarms, display behavior and model-specific control evidence. This page is written for Belmont 94002, including Hallmark, Belmont Country Club, Belmont Hills, Haskins Estates, Cipriani and Belmont Heights.
Direct answer for alarms and codes
A Sub-Zero alarm in Belmont should be photographed before reset and interpreted with actual temperatures, model and serial number, door condition and airflow evidence; a code alone is not a board order.
Alarms are clues. They can point to temperature, door seal, sensor, fan, control or sealed-system conditions depending on model family and symptom history.
Alarm -> first test -> quote boundary
| Alarm pattern | First test | Possible branch | Quote boundary |
|---|---|---|---|
| Warm alarm | Actual temperatures and airflow | cooling, seal, fan or control | No sealed-system quote from alarm alone |
| Door alarm | Door contact, hinge and reveal | switch, panel or alignment | No board quote first |
| Display blank | Power and safe response checks | display, board, harness or power | Technician electrical diagnosis |
| Repeated reset | History and post-reset trend | unresolved temperature or control fault | Do not erase evidence |
| Ice/water alert | Fill and freezer temperature | water path or ice module | No module quote from code only |
Ranges are planning bands, not a final quote. Final price depends on model, serial range, access, part availability, cabinet movement and diagnosis. No unsupported phone quote or compressor quote is published here.
Evidence before quote
| Evidence | Why it matters | What not to do |
|---|---|---|
| Alarm photo | Preserves exact state | Do not reset first if safe |
| Model tag | Codes are model-specific | Do not use universal chart |
| Temperatures | Shows true temperature event | Do not trust display alone |
| Door/cabinet photo | Shows panel and switch clues | Do not force door |
| Recent history | Cleaning, loading, outage or reset context | Do not omit timing |
A control or board quote should name the model-specific test and why a temperature, door or airflow cause was not enough.
Belmont local proof
Belmont alarms often occur in panel-ready kitchens where door alignment, heavy panels and restricted airflow can create non-board symptoms. Belmont Hills access makes it especially useful to have ready photos before a second trip for a control part.
Related Belmont Sub-Zero guides
Sub-Zero not cooling in Belmont separates one-compartment, both-compartment, frost and alarm patterns.
Model and serial number guidance reduces wrong-part quotes.
Cabinet-safe service covers panels, floor protection, water slack and pull risk.
How a diagnosis is documented shows the symptom, first test and proof behind each repair.
Contact and booking explains the phone and online booking routes and what follow-up confirms before service.
Sub-Zero control & alarm repair price ranges (Belmont)
Planning ranges once an alarm is traced to its actual cause.
| Service / symptom | What's included | Belmont price range (94002) | Typical time |
|---|---|---|---|
| Diagnosis with alarm reading | Read the code and run a model-specific control test | $95–$185 | 45–90 min |
| Thermistor / sensor replacement | Sensor by serial behind an alarm | $190–$430 | ~1 hr |
| Electronic control board | Board by serial, programming and verify | $470–$1,150 | 1–3 hrs |
| User-interface / display module | Display or UI board replacement | $320–$760 | 1–2 hrs |
| Defrost-related alarm repair | Defrost sensor or heater after a frost test | $260–$680 | 1–3 hrs |
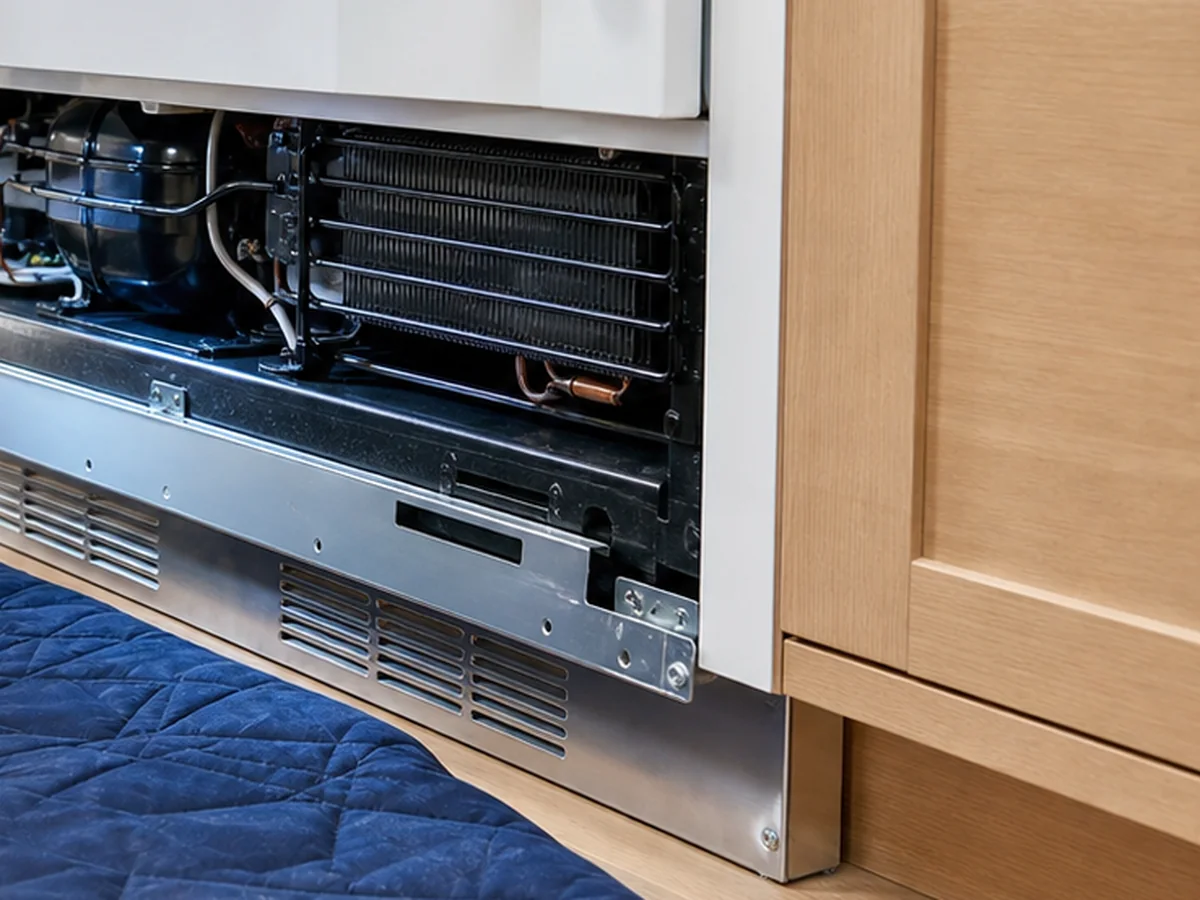
What moves the final number in Belmont: model and serial range, hillside or panel-ready access, condenser condition after bay salt air, and whether the fault is confirmed by an on-site test.
Common Sub-Zero alarm clue, likely meaning and first action
| Alarm / display clue | Likely meaning | First action |
|---|---|---|
| High-temperature alarm | Door left open, recent load, or airflow/sensor fault | Note both compartment temperatures before resetting |
| Door / vacuum alarm | Recent opening or a gasket seal pressure issue | Check the door closes square and photograph the seal |
| Sensor / service indicator | Thermistor or control reading out of range | Do not buy a board; book a sensor test |
| Clean-condenser reminder | Coil airflow restricted by salt-air dust | Clean the accessible grille, then verify the temperature |
Belmont 94002 questions
My Sub-Zero shows an alarm, does that mean I need a new control board?
Usually not. An alarm is a clue, not a diagnosis. Many alarms trace to a $190–$430 thermistor or to restricted condenser airflow, not the board. Photograph the alarm and both compartment temperatures before any board ($470–$1,150) is approved.
Should I keep resetting a Sub-Zero alarm?
No. Repeated resets erase timing evidence and can hide a sensor, door or true-temperature fault. Photograph the alarm first, record fresh-food and freezer temperatures, and note whether the alarm returns; that makes the code far more useful.
Alarm and code evidence FAQ
Should I reset a Sub-Zero alarm before service?
Photograph the alarm first if food safety allows. Then record fresh-food and freezer temperatures and note when it appeared. Repeated resets can erase evidence that separates a true temperature event from a sensor, door or control issue.
Can an alarm prove the control board is bad?
No. A control board should not be quoted from an alarm alone. Door alignment, thermistors, airflow, temperature events and wiring can all create display symptoms. The model and serial number decide the correct test path.
What alarm evidence should I have ready?
Have ready the display photo, model tag, both compartment temperatures, door/frost photo if present and a note about recent cleaning, loading, outage or reset. That evidence makes the code useful.
Are Sub-Zero codes universal across models?
No. Alarm behavior and service indicators can differ by model family and control generation. An online code list can be a clue, but it should not be used to order a part without model-specific testing.
Can a door issue trigger repeated alarms?
Yes. Door switches, hinge sag, panel reveal and gasket contact can trigger or contribute to alarms. In panel-ready Belmont kitchens, a full door photo helps identify whether the visible alarm may be an access or alignment issue.
How is alarm repair priced?
The quote depends on whether the evidence supports door/switch, sensor, fan, control, wiring or cooling work. No unsupported flat fee is published. Have ready alarm photo and model tag so follow-up can confirm the diagnostic route.
What Belmont customers say
Our Sub-Zero kept showing an alarm. They photographed it first, treated the code as a clue, and found the actual sensor issue instead of throwing a board at it.
They knew the model-specific control behavior and reset the alarm only after fixing the temperature cause. Very thorough.
Clear explanation of what the error code meant and what it didn't. No unnecessary parts.
Serving Belmont, CA 94002 and nearby neighborhoods by appointment. Call or book online to schedule your Sub-Zero service.